Showing posts with label Technical Art. Show all posts

Saturday, January 31, 2015

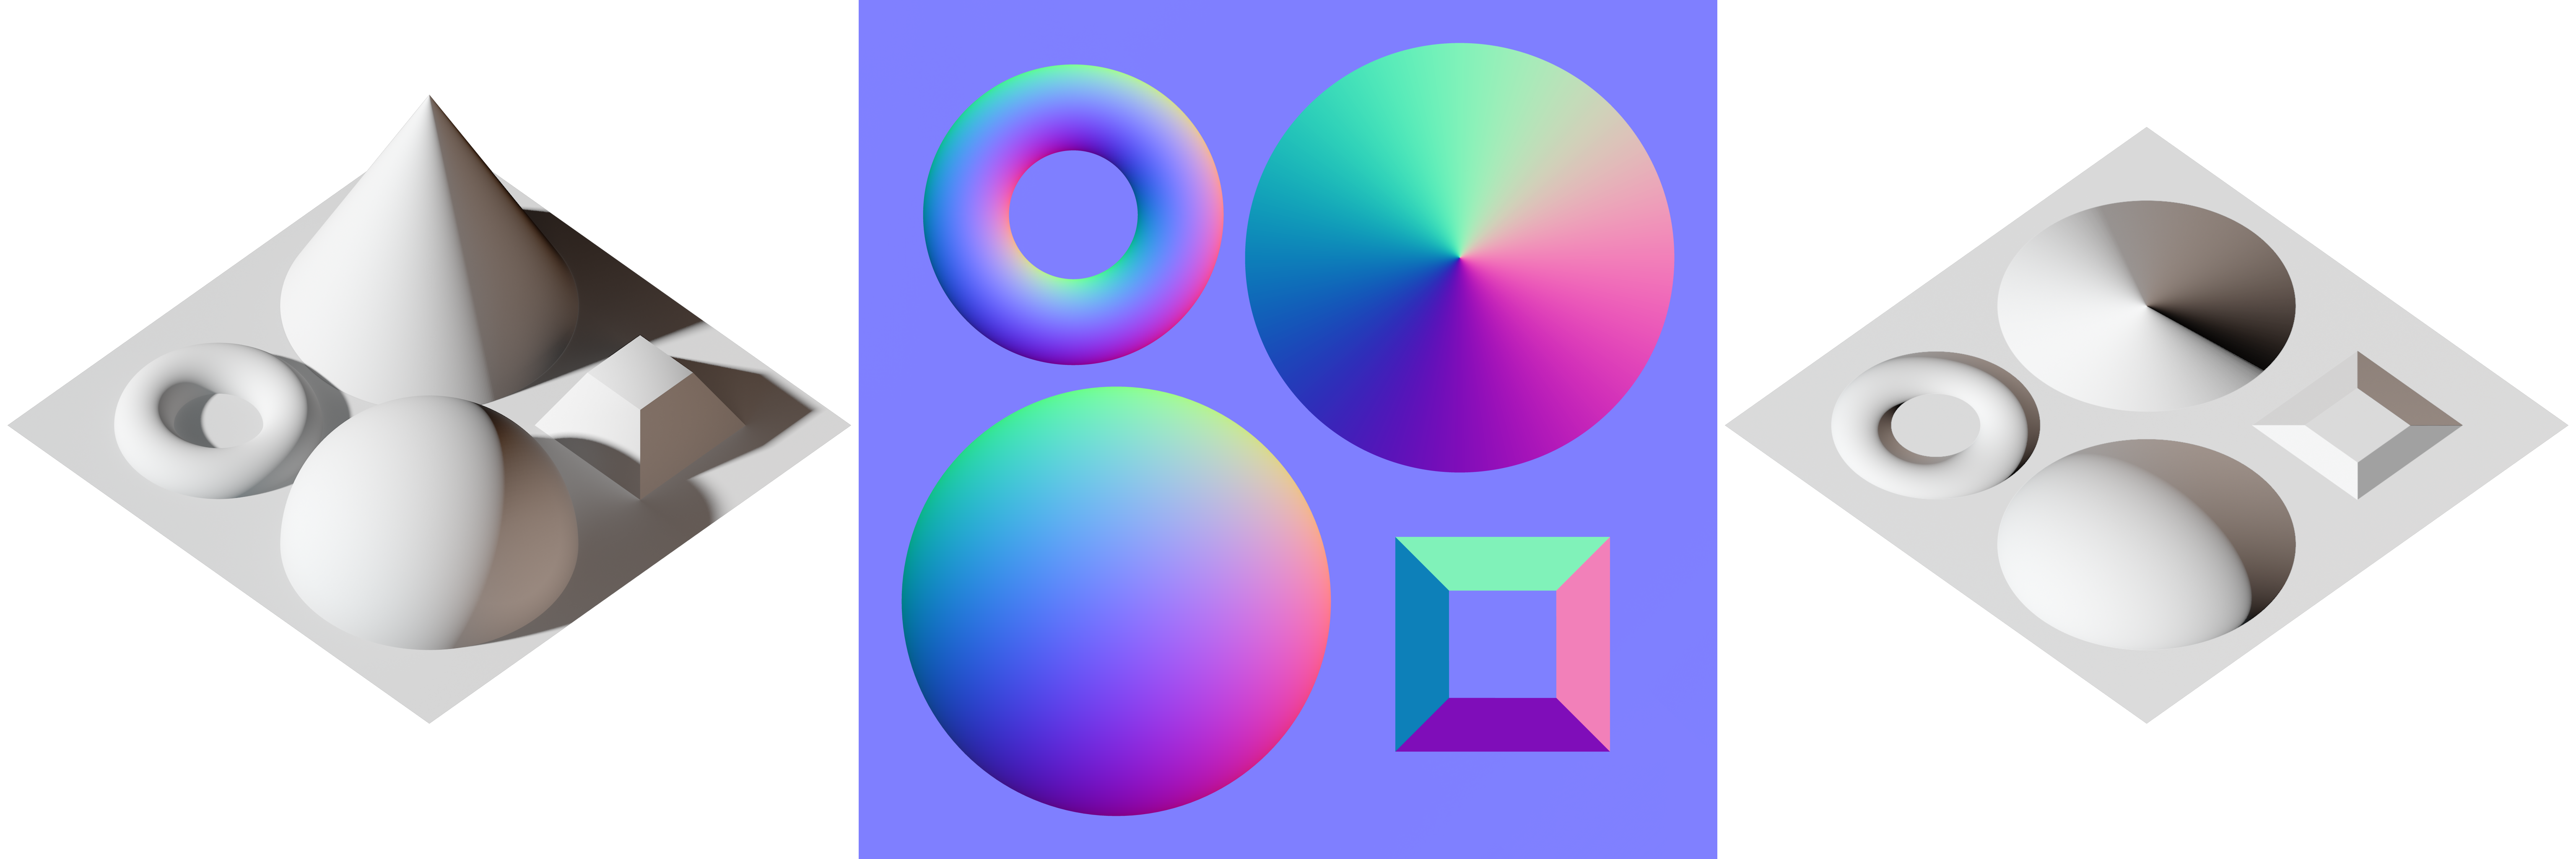
Normal Map Palette

This is the palette I use when I'm fixing or painting normal maps, I find it easier to pick from a segmented sphere rather than a smooth sphere -- just for the sake of consistency. If you want a smooth sphere or cone to sample from, Wikimedia's got you covered here:

Happy painting!

Friday, January 16, 2015

Shader / Material Reference

I've decided I should make this a permanent and publicly searchable page on my blog (I keep losing links), so here's a place where I'll compile shader and material reference (code, scans, samples, best practice documents, reference images, etc) for myself and for other people working on such things. This will likely be primarily focussed on physically based rendering topics, but there may be other stuff here as well.

Tuesday, January 13, 2015

Basic Biped Controls for Maya / Mecanim Character

I was so tired of not having at least basic controls for a mecanim compatible rig that I finally broke down and made a really basic set of controls for one of the Mecanim default characters.

He's nothing that special: FK arms + IK legs, no special face/hand controls or fiddly bits. You'll still have to directly animate on the bones for hand and face animations, but at least doing basic blocking and pose-matching won't take so long now :D


One of the benefits of this being really simple is that I think the fbx should work a lot of places (please let me know if I'm wrong), so I have an MB and and FBX file you can download and use.

Other than that, he's really just the default mecanim body -- skinning and all. You shouldn't have any trouble bringing him in engine as long as you remember to turn on animation export (and baking) in the fbx export dialog.

MB file for Maya
FBX file for Maya and Everything Else

Wednesday, January 7, 2015

Small Reel Update

This most recent update to my reel includes my shader work. Other than that, it's pretty much the same as my other recent reel update.


Anyway, thought I'd crosspost it here :)

Friday, December 12, 2014

VFX Reel 12-11-2014

Since I'm applying to some new jobs recently, I decided to collect and demo some of my recent VFX work. It's mostly particle work, but there's a bit in there about the new ribbon component I'm working on which is meant as an upgrade to the existing Trail Renderer in Unity and a quick mention of my new particle shaders, scene color control script, and the shockwave script I wrote to make my explosion effects more dynamic.


The particle shaders I wrote have their own dedicated video:


And my other recent shader project, the Simple Physical Shader set, is detailed in another:


Monday, December 1, 2014

WIP Ribbon Component

I've been doing tests recently for a ribbon effect system. It is meant to give some more functionality to the normal Unity Trail Renderer Component. Ribbons, unlike the trail renderer, can move around after being spawned. It can do things like inherit velocity from its emitter object, react to gravity and wind. spawn with velocity along some worldspace vector, and move around with perlin noise.

You can also put a scrolling texture on it to help sell the illusion that the ribbon material is hanging in the air.

Saturday, November 15, 2014

Physically Based Shader 1.1: "Simple Physical Shader"

My physical shader is now released! Check out the demo video for Simple Physical Shader 1.1:


Learn more and get the playable demo here:
http://ryangatts.weebly.com/simple-physical-shader.html

Get the shader on the Unity Asset Store here:
https://www.assetstore.unity3d.com/en/#!/content/22143

Simple Physical Shader is a general-purpose physical shader that is intended for users who are new to Physically Based Rendering (PBR) and want a simple shader that can be mixed and matched with the Unity default shaders.

Simple Physical Shader works on Unity Free, on any devices that support Shader Model 3.0, and was developed to provide a usable PBR shader for projects that don't use HDR or linear lighting and for users who don't want to worry about baking out cubemaps. It uses maps that are human readable and easy to generate.

It's still under development, so expect support for core and edge retroreflectivity (for safety vests and velvet materials) as well as one that has a second specular lobe (for materials with a clear coat on top like car paint or wet skin).

Monday, October 20, 2014

ShaderLab + CG highlighting for Notepad++

I finally got around to fixing my style and code highlighting for Unity Shaderlab CG in Notepad++. If you want something similar you can download it here: link
To import it, download this file to Appdata>Roaming>Notepad++ . Then, in Notepad++, go to Language>Define Your Language... and click the import. Make sure you set your global background style to something dark (Settings>Style Configurator>Enable Global Background Colour).

It's based on Luiz Alvarez's CG highlighting, with some color style edits to make it look better and work on a dark background, and additional keywords added so that major shaderlab terms are highlighted.

Tuesday, October 7, 2014

Hatching Shader

I was troubleshooting some shader problems on the Unity forums, and ended up overhelping and making a pretty decent-looking crosshatching shader (if I do say so myself). Here's what it looks like:


The UV math is a little messed up, but I think it looks pretty cool :D.

---edit---

(can't stop. won't stop) I went ahead and fixed the uv math. It now uses the UVs of MainTex rather than of Hatch0 as it's main input. I was going to resolve (read: "re - solve" as in "solve again") all of the other UVs separately, but it made the inputs a pain to set up when making a new material, so I just left the Hatch Density input.

Friday, October 3, 2014

Explosions with shockwaves

So, implementing this in a dynamic way is still giving me some lingering sorting/rangefinding problems, but I think this effect has legs :)


The green lines are debug. The explosion effect performs a check to see how far away it is from the ground and then spawns user-defined secondary effects based on how close it is. These effects also fade out the farther away the explosion occurs (by manipulating the start color alpha value of the shockwave effects). As you can see on the left, those two explosions are close enough to the ground to kick up a vertical column of debris underneath them. The explosion on the right is too high, and only spawns the shockwave ring. 

These effects can also be delayed slightly to give the impression that it took time for the expanding pressure wave to reach the ground and kick up the dust.

You can also see the sorting errors that are currently causing me trouble :/ Unity never has been very good at sorting particle effects. Does anyone know a good way around this problem?

Thursday, October 2, 2014

Lit Particle Shaders Demo

I've been working on some custom shaders for Shuriken particle effects in Unity. The main idea is to fill gaps that currently exist in the available alpha blended material.


Crucially, the default alpha blended material does not receive light from the scene -- not ambient or direct illumination. I originally wanted to also support point lights, but with the current limits on what data you can know about particle positions and normals, it ends up being a fairly complicated and performance-prohibitive feature.

That's why my shader supports lighting from directional sources and ambient sources. I did manage to get vertical hemispherical lighting working, so particles can receive disparate lighting from the top and bottom (either directional on top or on bottom).

There's also not good default way of modelling emissivity in particles. You have to either have two particle systems with two different materials one alpha and the other additive, or take what you can fudge from the alpha blended. I found myself always making "glow" particle effects to play alongside other effects, so I just wrote a shader that supports that kind of effect by using multiple passes and materials. Unfortunately, Shuriken can only pass one float4 value through the vertex color input of a CG program, so the "color" values in the Shuriken system only refer to the glow color and the general alpha of the particle. The "background" color of the particle can only be adjusted per-material. This turns out to not be much of a problem in practice, though, and it's an unambiguous step up from the default workaround for this effect.

Anyway, I hope to make it available for purchace on the asset store shortly.

Monday, September 29, 2014

Some Particle Flipbooks

I've been working on various techniques for making particle flipbooks easier to author. I've done some tutorials on fire and smoke (you can find them on my youtube channel), but I want to share a sort of gallery of effects I've managed to get and how I got them.


So, initially, I was trying to reproduce the look of GTA5's particles, so I tried baking out fluid simulations from Maya. The sim on the right was solved in 2d and was pretty quick to solve and render. The one in the middle was solved in 3d and was really really slow to work with. These two both have nice subtle animation, but they took forever to set up and to bake. The one on the right is generated completely from turbulent noise effects and masks in After Effects. I felt a lot more control here, and it was much faster to make (I'm very comfortable in AE, though, so your milage may vary).


These two effects were both hand made without a sim. The one on the left was made using the same kinds of noise effects as in the smoke effect above. The one on the right was animated as traditional frame-by-frame 2d animation in Flash and then modified in After Effects to add detail. I have a tutorial for how to do this on my Youtube channel, but suffice to say, it gives you a lot more control over the final look of the effect. That said, this technique doesn't scale well to effects longer than 32 frames long (or 64 if you're really patient). Because it relies on hand-drawn animation rather than tweens, as you double the length of the animation, you double not only the cost of keeping all the sprites for the animation in memory during the game, but also, you linearly increase the amount of work to make the effect in the first place, which is a problem that tweens don't have.

Anyway, feel free to ask questions if you have any. I have many many more flipbooks than these, but the ones here are fairly representative of the various ways I've tried to solve fire and smoke systems.

Wednesday, September 10, 2014

Physically Based Shader v0.2

Just a quick demo on progress. You can also see my in-progress lens flare controller in this scene! I made this video to show off my progress at a Unite party. I'm actually a little bit farther than this level of quality now, but that will have to be for later. I've decided I'll be submitting it for free to the Unity Asset store shortly!

Friday, July 18, 2014

Quick Point-Lit Particle Update


I have an upcoming video I'm working on going over a bunch of utility scripts I've made just to speed up my workflow in unity, and I've finally solved (well enough for the moment anyway) one of the most persistent problems I've had: point-lit particles.

It's a true pain in the butt and no one has really solved it (lots of pretty good attempt though) due to the particle vertices being located in camera space and not world space (where the lights are). Farfarer has made strong progress in solving this translation problem, but his solution did not work the way I wanted it to, so I made a simpler -- if less robust -- approximation to be used here.

Anyway, look forward to more soon! The other scripts I'll be showing off are also running in this scene, but I'll get more into that next time.

---Edit from 2 months in the future---

You are so wrong. This is not the right way to solve this, and your idea won't work :P

Sunday, July 6, 2014

Physically Based Shader v0.12

More progress on the Physically Based Shader for the free version of Unity. I've improved the math for the ambient diffuse contribution. It should now behave very similarly to hemispherical ambient light solutions you might see elsewhere. Next I'll probably re-tackle the math for how the ambient light setting is combined with the RSRM. The one I'm using still ends up a little too saturated in extreme lighting conditions -- though it's really not noticeable in most scenes now.


This scene is wearing out its usefulness in demonstrating new features, so this may be the last time you see the bunny, the rocks, and the kyles like this. I actually broke this scene in the latest version of the shader and had to reset the material settings, lights, and camera by eye. :/ The shader can cast and receive shadows now and I've fixed a bug that couldn't be seen in this scene where objects that were lit by multiple point lights would double accumulate fog.

In the new scene, I'll also be showing off new tools for wrangling scene render settings, skybox tint, key light settings, distance fade-able flares, ambient light-skybox calibration, and a fog light scattering approximation. So stick around for that!

Hit the jump for a couple more pictures including just the ambient contribution and some different lighting conditions.

Sunday, June 29, 2014

Ludum Dare 29: 72 Hour Jam Game: The Fields


The above video has a breakdown of game design and technical art decisions made while making my latest jam game "The Fields". Hit the jump for a link where you can play the game, a quick synopsis of the game, bunch of links about shaders and graphics programming.

Thursday, May 8, 2014

Physically Based Shader v0.11

RSRMs are up and running on my PBR shader.

Local point lighting.
Directional lighting from behind camera. Materials are exactly the same.
Here's a quick demo of the setup. You can see a material with various levels of smoothness and metallicity:

Sunday, May 4, 2014

Physically Based Shader v0.10

So I started learning CG a few weeks ago (partly inspired by an awesome GDC talk by Sean Murphy) in order to build a physically based shader. This here is the first version of that shader:


The shader takes four texture maps: "main color", "smoothness", "metallicity", and "normal". The main color gets split into the specular and diffuse map based on the smoothness and metallicity of the material. The specular contribution is a normalized Blinn-Phong and the diffuse contribution is an NdotL normalization that I made. Using a "light wrap" property, the material can transition from a lambert, to Valve's half-lambert, to a perfectly translucent material. This wrap can be used to help emulate partially bounced light and subsurface scattering with minimal additional cost. Both the spec and diffuse contributions are affected by a fresnel term that is softer on rough materials and shallower (due to a higher base reflectivity) on metallic materials. I also decided to use a physically-inaccurate attenuation model that uses a gaussian curve instead of the square of the distance. This sort of falloff is much easier to work with in a practical case because near to the illuminated object, it better models the light coming off an object that is not an infinitesimal point. This attenuation is currently calibrated to work best at ranges up to 15 meters (after which, the contribution of an individual light falls effectively to zero, and the light can be culled).

I had this shader nearly finished when Ludum Dare 29 started last weekend, so I used it all through the production of "The Fields" in order to test the shader's applicability in an actual production.

Rabbit in a minefield; lit by one directional light and an ambient.
I'm happy to report that it went pretty well! I discovered a bug that caused negative lighting in very rough, very metallic materials, but luckily, I was working in a game that only had rocks, dirt, wood, grass, and bunnies, so it wasn't much of an issue. After LD, I went back and fixed the bug (a problem in how I was normalizing my spec contribution that could cause it to go negative) and here we are at version 0.10!

Since it doesn't take very many maps and two of the maps are black and white, I found it pretty easy to work with and maps were generally pretty easy to generate. Everything except for the wood is hand-painted, and the only things in the scene not using the physical shader are the alpha cut-out materials. I hope to have a greater variety of colors and materials to shade in the next use case; World War I is not a very vibrant setting.

I still have a ways to go. The current shader uses the unity ambient light to determine non-direct shading and environment reflectivity. This looks okay on rough materials and diffuse materials, but becomes obviously flawed on specular metals -- especially when they have a not-very-noisy normal map. Next version will support RSRMs that will either be stand-alone reflectance maps, or will be overlayed on the ambient light and provide more value information than color. I think I'll add support for cube maps, since the main point of this shader is to be easy to work with and cheap to render, and I find cubemaps (and their mips) to be a pain in the ass to generate and work with (you can only ever appreciate them on extremely smooth surfaces, and if you have a lot of those, the failures of non-parallax corrected cubemaps start to show anyway).